
 Introduction
K10 is a data management platform, purpose-built for Kubernetes. It provides enterprise
operations teams an easy-to-use, scalable, and secure system for backup/restore, disaster recovery, and mobility of Kubernetes applications. This article shows how we deliver on the “easy-to-use” and “secure” aspects of the product by enabling OpenID connect (OIDC) based authentication with well known providers such as Okta, Google, Dex, Keycloak and Ping ID to name a few.
Enterprises who have already deployed apps in Kubernetes environments with OIDC based authentication, find it really useful to deploy K10 using familiar authentication workflows . Enterprises who are new to OIDC will also find it easy to adopt it as this post will show. In either case, they find the ability to use fine grained role-based access control very appealing when deploying apps like K10 with OIDC.
These topics will be covered in this post:
- OpenID connect (OIDC)
- The Authorization Code Flow
- Tutorial for setting up an OIDC provider using an Okta dev account and for setting up K10 with OIDC.
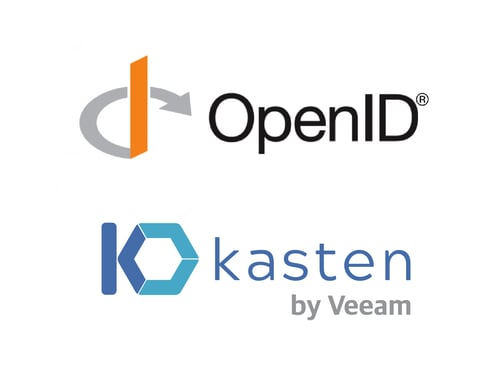
OpenID Connect - OIDC
OpenID Connect 1.0 is a simple identity layer on top of the OAuth 2.0 protocol. It allows Clients to verify the identity of the End-User based on the authentication performed by an Authorization Server, as well as to obtain basic profile information about the End-User in an interoperable and REST-like manner. [1]
The Authorization Code Flow
This diagram shows the sequence of events when a user accesses K10’s dashboard. It shows the entities involved in the flow — the browser, K10’s authentication service, and the OIDC provider.
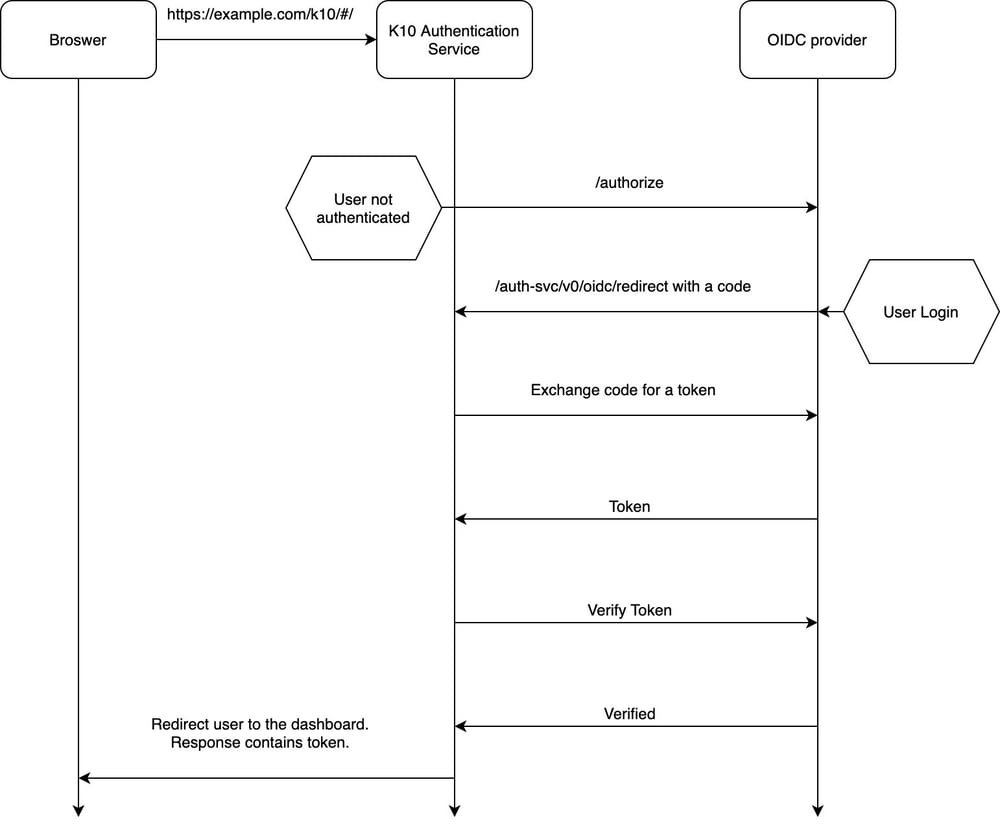
- Every request from the browser reaches K10’s authentication service. The first request from the browser will arrive without a cookie containing a token in it. The service considers the user as unauthenticated and hence redirects to the OIDC provider.
- K10’s auth service invokes the provider’s /authorize endpoint. The callback URL for K10’s auth service is https://example.com/k10/auth-svc/v0/oidc/redirect . This gets included in the /authorize HTTP request.
- The OIDC provider compares K10’s callback URL with the one registered with the OIDC provider. Only when they match, the OIDC provider proceeds with the flow and presents a login window.
- If the callback in the request and the callback registered at the provider does not match, the OIDC provider will redirect back to K10’s auth service with an error indicating that the redirect URL did not match.
- Assuming that they do match, the next step is that K10’s auth service uses the “code” returned by the provider while making a request for a JSON Web Token ( JWT ).
- The OIDC provider then responds with a JWT to K10’s auth service.
- K10’s auth service then requests for verification of the token. If verification succeeds, it redirects the user to K10’s dashboard.
- Subsequent requests from the browser reach K10’s authentication service with the token in the request. Since this token is valid, the authentication service will not redirect to the OIDC provider anymore. This will continue to happen until the token expires.
Setup the OIDC Provider
![]()
This tutorial will require the creation of an Okta developer account. Follow the instructions at https://developer.okta.com/ for creating an account. [2]
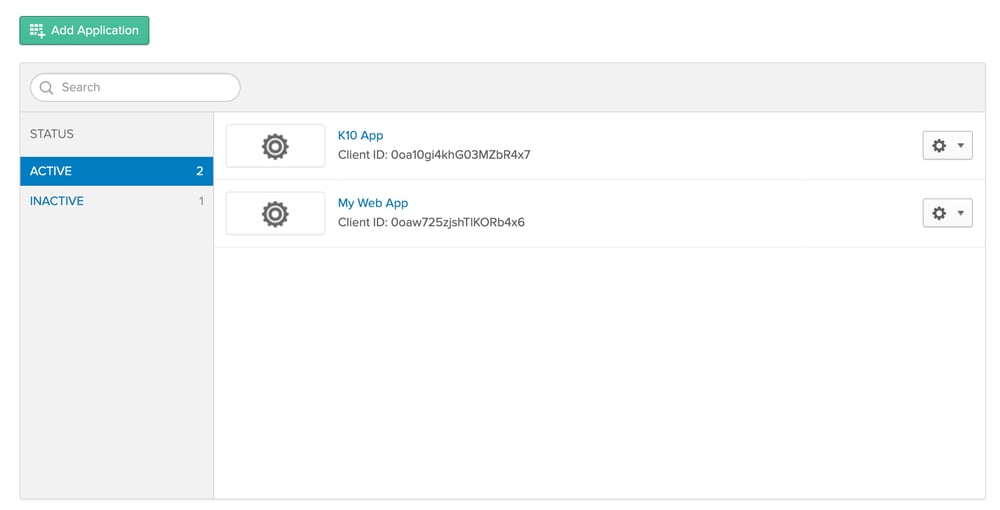
After logging into the developer account and navigating to the “Applications” section you will see a page like the one below. Click on “Add Application”
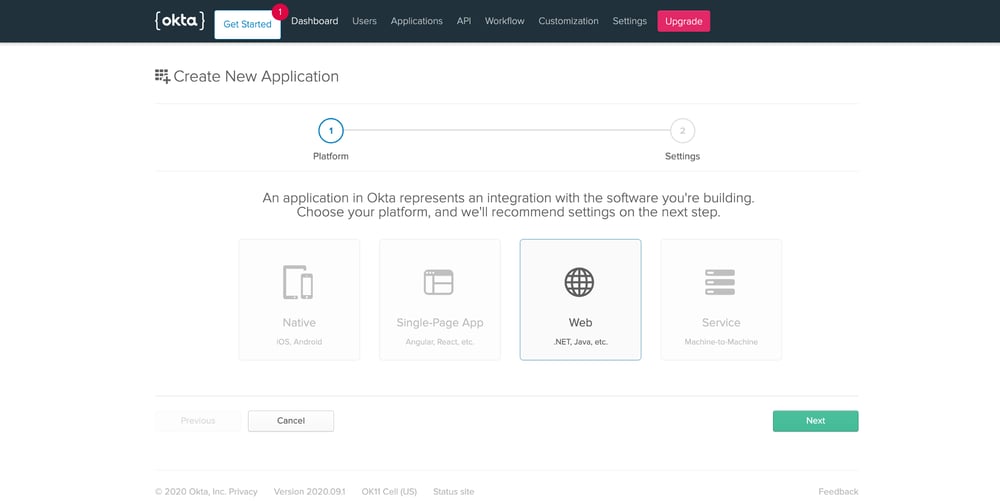
Next, select the application type as “Web” and click “Next”.
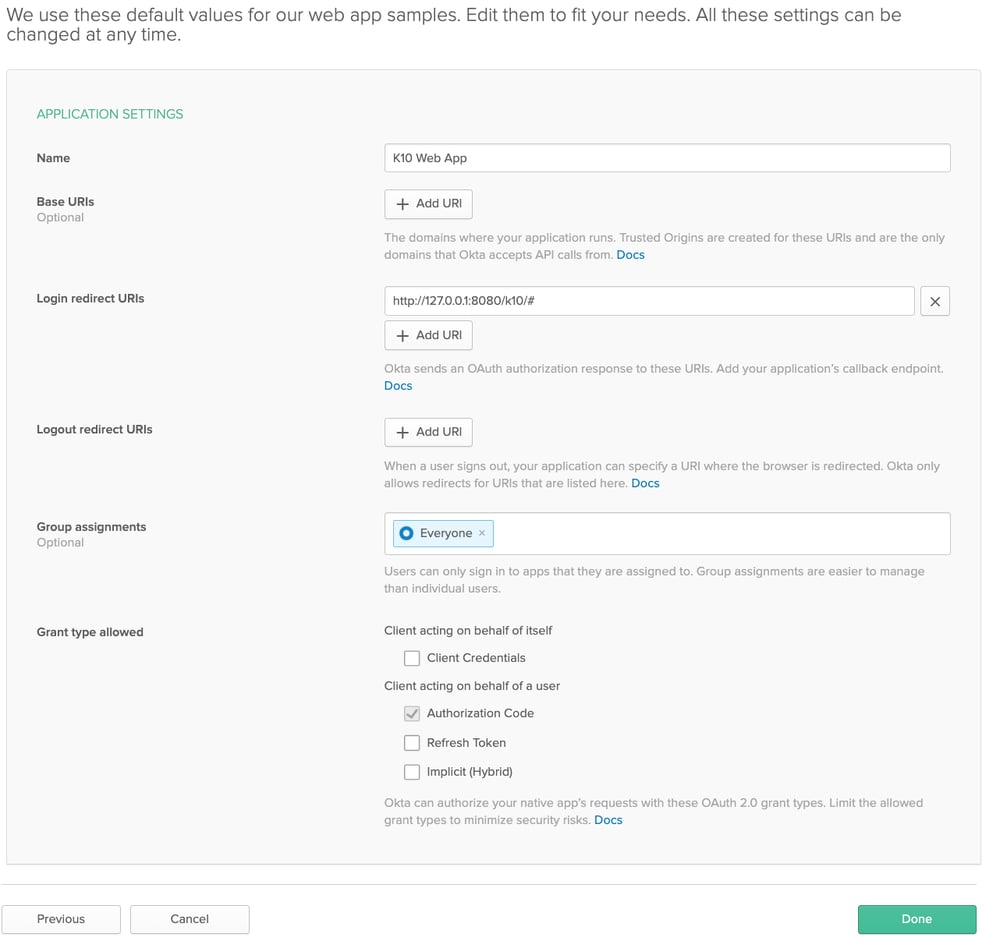
The next page will show application settings with default values.
- Set a name for this Application.
- Set the “Login redirect URIs” to http://127.0.0.1:8080/k10/#/
- Make sure that the “Authorization code” check box has been enabled.
- Click “Done” to create the Application
NOTE: The “Login redirect URIs” field has to be set to http://127.0.0.1:8080/k10/# for this tutorial.
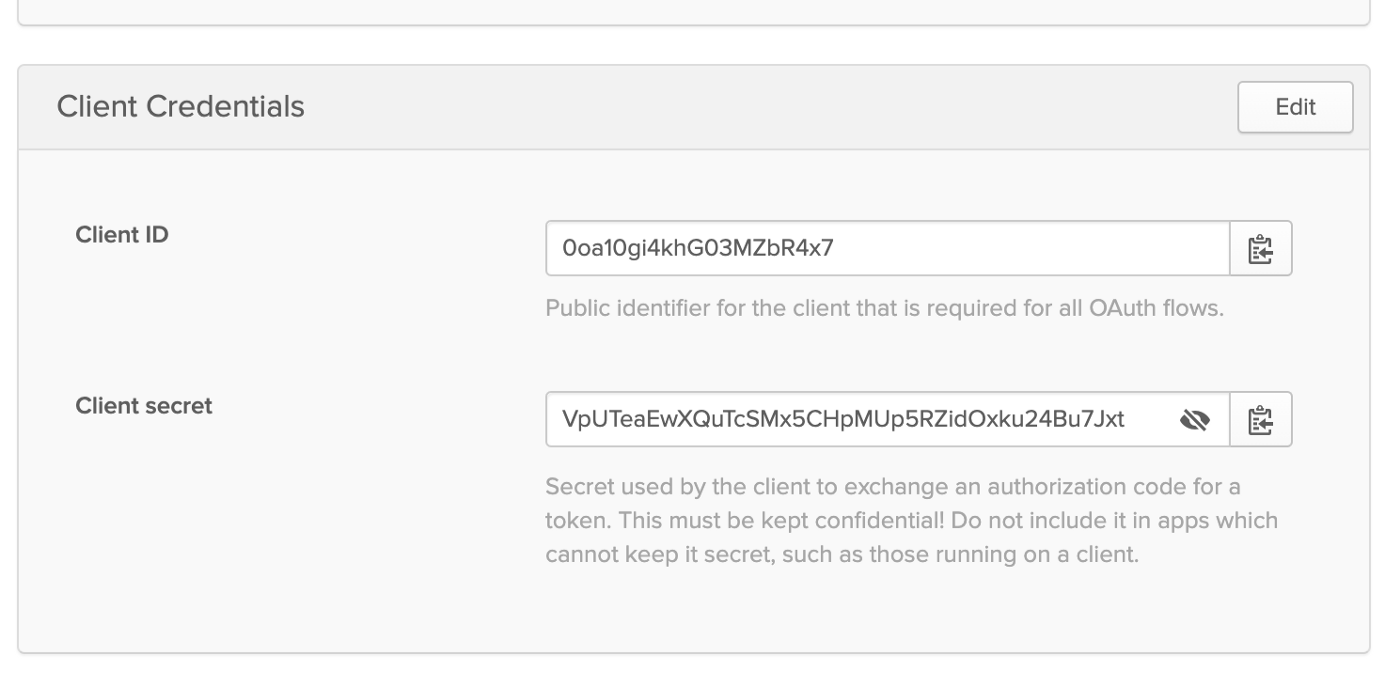
After the application has been created note down the “Client ID” and “Client secret”. This will be used while installing K10 in the next section.
Setup K10 with OIDC
Tools that are used in this section are:
- kubectl — Kubernetes client
- Helm v3
To install using helm, you can find documentation on Kasten K10. Please see the pre-requisite tools that are mentioned above before starting this tutorial.
We use Kasten’s K10 Helm chart to install K10 on a Kubernetes cluster using Helm v3.
helm repo update

helm repo add kasten https://charts.kasten.io/
Create a namespace to deploy the K10 application there:
kubectl create namespace kasten-io
Install K10 in the kasten-io namespace using the command below
You will have to change the following fields while following this tutorial:
- The provider URL should point to your Okta developer account’s URL
- https://<your account>.okta.com/oauth2/default
- The client ID and client secret noted down in the previous section about setting up Okta.
- The remaining fields can be left unchanged.
helm install k10 kasten/k10 --namespace=kasten-io \

--set auth.oidcAuth.enabled=true \

--set auth.oidcAuth.providerURL="https://dev-270657.okta.com/oauth2/default" \

--set auth.oidcAuth.redirectURL="http://127.0.0.1:8080" \

--set auth.oidcAuth.scopes="profile email" \

--set auth.oidcAuth.prompt="select_account" \

--set auth.oidcAuth.clientID="0oa10gi4khG03MZbR4x7" \

--set auth.oidcAuth.clientSecret="VpUTeaEwXQuTcSMx5CHpMUp5RZidOxku24Bu7Jxt" \

--set auth.oidcAuth.usernameClaim="email"
Helm install will create multiple deployments and services and you can validate the install by the following command:
kubectl get pods -n kasten-io — watch
Once the pods are in running condition, you can access the K10 dashboard at http://127.0.0.1:8080/k10/#/ after running the following command:
kubectl --namespace kasten-io port-forward service/gateway 8080:8000
When visiting the dashboard for the first time, you will be redirected to the Okta login page like the one seen below.

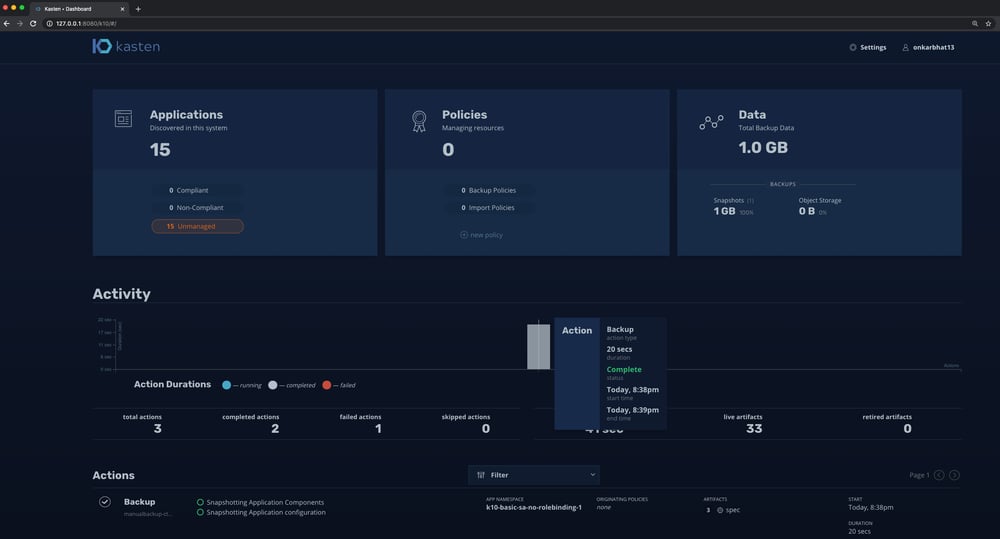
After logging in successfully with Okta, you will be redirected to the K10 dashboard as shown below.
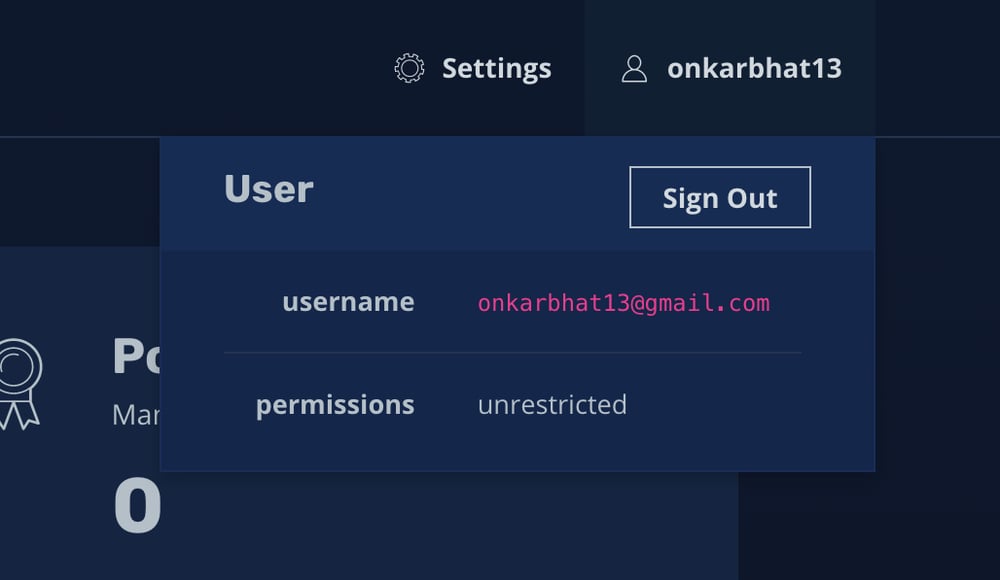
On the top right corner, when you hover over the username , you will see the whole username and the permissions for this user which may be “unrestricted” for an admin user, or “limited access” for non admin users.
RBAC — Role Based Access Control
Notice that the username in this tutorial has unrestricted admin access to K10. These were the commands used to enable administrator access for “onkarbhat13@gmail.com”
kubectl create clusterrolebinding onkar-crb --clusterrole=k10-admin --user=onkarbhat13@gmail.com

kubectl create rolebinding onkar-rb --role=k10-ns-admin --user=onkarbhat13@gmail.com --namespace=kasten-io
We will cover more about RBAC in a future article. If you would like to learn more about RBAC for K10.[3]
Conclusion
In this tutorial, we covered the steps for setting up an Okta account for OIDC and installation of K10 with OIDC based authentication.
Since the OIDC Authorization code flow follows a well known standard, K10’s OIDC integration works with any OIDC provider.
In a future blog post, we will also talk about setting up groups in the OIDC provider and enabling the groups scope while installing K10. You can learn more about K10’s OIDC integration.
GET STARTED TODAY!
Try the fully-featured and FREE Edition of Kasten K10 with this super-quick install in less than 5 minutes.
References

Onkar Bhat is a member of the technical staff at Kasten and has been working on solving problems pertaining to data protection and disaster recovery in cloud native environments. His focus has been in the areas of authentication and authorization for multi-tenant and self-service data protection in Kubernetes. He previously worked as a Technical Lead in the SDN controller team at Big Switch Networks, which was acquired by Arista Networks in 2020. Prior to Big Switch, Onkar worked at NetApp on the SnapMirror team, backup and disaster recovery for on-prem storage, and the Altavault product, a cloud backup appliance. He has also worked on the Catalyst 6K team in the area of deep packet inspection at Cisco Systems. Onkar received his MS from Carnegie Mellon University.